Desktop Computers or Laptops - Signing In
How to Sign Into McKinley Health Center's Telehealth Service with a Desktop or a Laptop
1. The Appointment Reminder
Prior to your telehealth visit, you will receive an email with an appointment reminder and a link to your visit. The reminder should have a link that looks something like: https://illinoismckinley.zoom.us/my/mhcX.
(Note: If you determine that you need to cancel your appointment prior to your visit, go here to do so: mymckinley.illinois.edu.)
2. What do I need to join my scheduled visit?
1. A private space where it is quiet and well-lit. We want to ensure that your McKinley provider can see and hear you.
2. A computer or cell phone that is fully charged or connected to a power source.
3. A computer or cell phone that has a built-in camera and microphone (almost all such devices have both.)
4. A reliable Internet connection (wireless or ethernet connected.)
5. A computer, laptop, tablet, or cell phone that meets the minimum technological requirements to run the Zoom client software.
3. Connecting with a Desktop Computer or a Laptop
1. Make sure you have pop-up blockers disabled for your default web browser.
2. Click on the link in your email (e.g. https://illinoismckinley.zoom.us/my/mhcX)
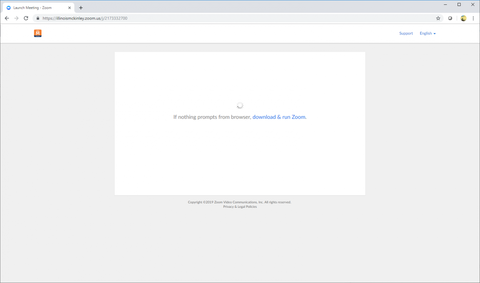
3. You should get the following screen. Click on "download & run Zoom." which will install the program and launch automatically. In the case of certain web browsers you will need to find the downloaded file and run it once.
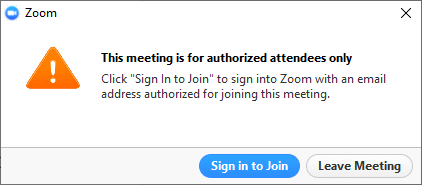
4. Upon running the client the following window will open up. Click on "Sign in to Join"
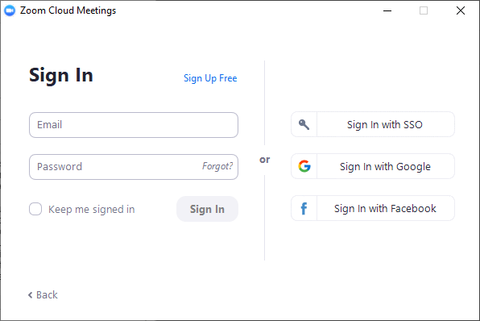
5. Once you are prompted to login with your credentials, you MUST click on "Sign In with SSO". This will use your Net ID and password from Illinois to confirm your access to our system.
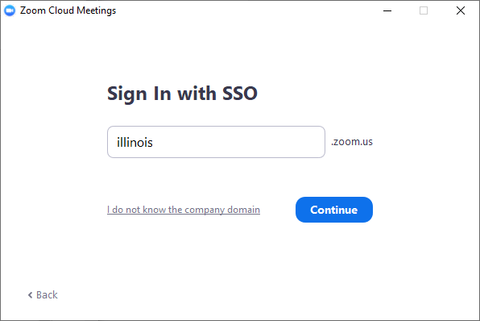
6. Enter "illinois" for the company domain:![]()
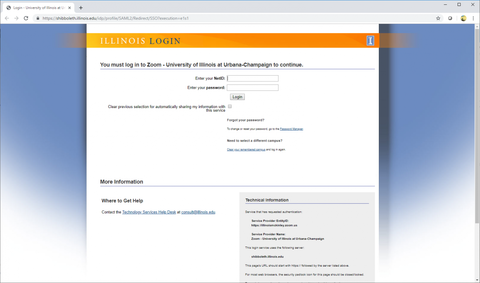
7. Enter your University of Illinois Net ID and password (and subsequently sign in with two-factor authentication):
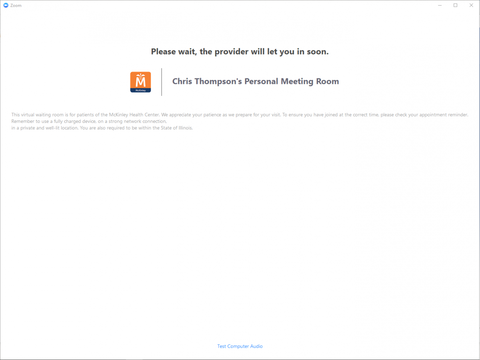
8. Upon a successful authentication to campus, you will see the following waiting room message. If you see this message you have successfully logged into your visit. When your provider is ready, she or he will admit you into the room and you will be able to talk to your provider.
3A. Additional Things to Check While Waiting:
9. From the image in step 8 above, take a moment at the very bottom to click on the "Test Computer Audio" link to ensure your audio settings work. Adjust your speaker and mic volume levels to ensure that you can hear your provider and your provider can hear you.

10. You can also take a moment to ensure that your video settings work by clicking on "Video"